Sunday, 17 November 2013

A wee finish and a glimpse of a big one

It's a finish!  Yay! 

The wedding quilt is finished, but I won't blog about it until it reaches its destination, in a week or two.  Well, maybe I will share a couple pictures, just because.

In the mean time, I have another finish of a much smaller scale...


A name tag!  I don't know what took me so long, I have belonged to one guild or another for the past 5 years... (and paid a lot of fines to the library for not wearing a name tag).  Now that I am getting ready for the first meeting of the Maritime Modern Quilt Guild, I thought, it's about time.   I was inspired by these cute name tags by Amanda Jean.  I did the embroidery free motion, by machine, and the whole project took me less than 24 minutes (one episode of the Backyardigans), start to finish! 

And now a glimpse of the wedding quilt I have been working on for a few months.  I decided to quilt it with wavy lines with occasional change of direction.  I used a variety of threads in blue, green, beige and browns, from the fine Aurifil 50wt to the much thicker Connecting Threads.


The quilt has not been washed yet, so all the little jerky movements are showing.  I try not to worry too much about those, because I am confident it will disappear with the wash.

Just for fun, I added a few trees here and there:
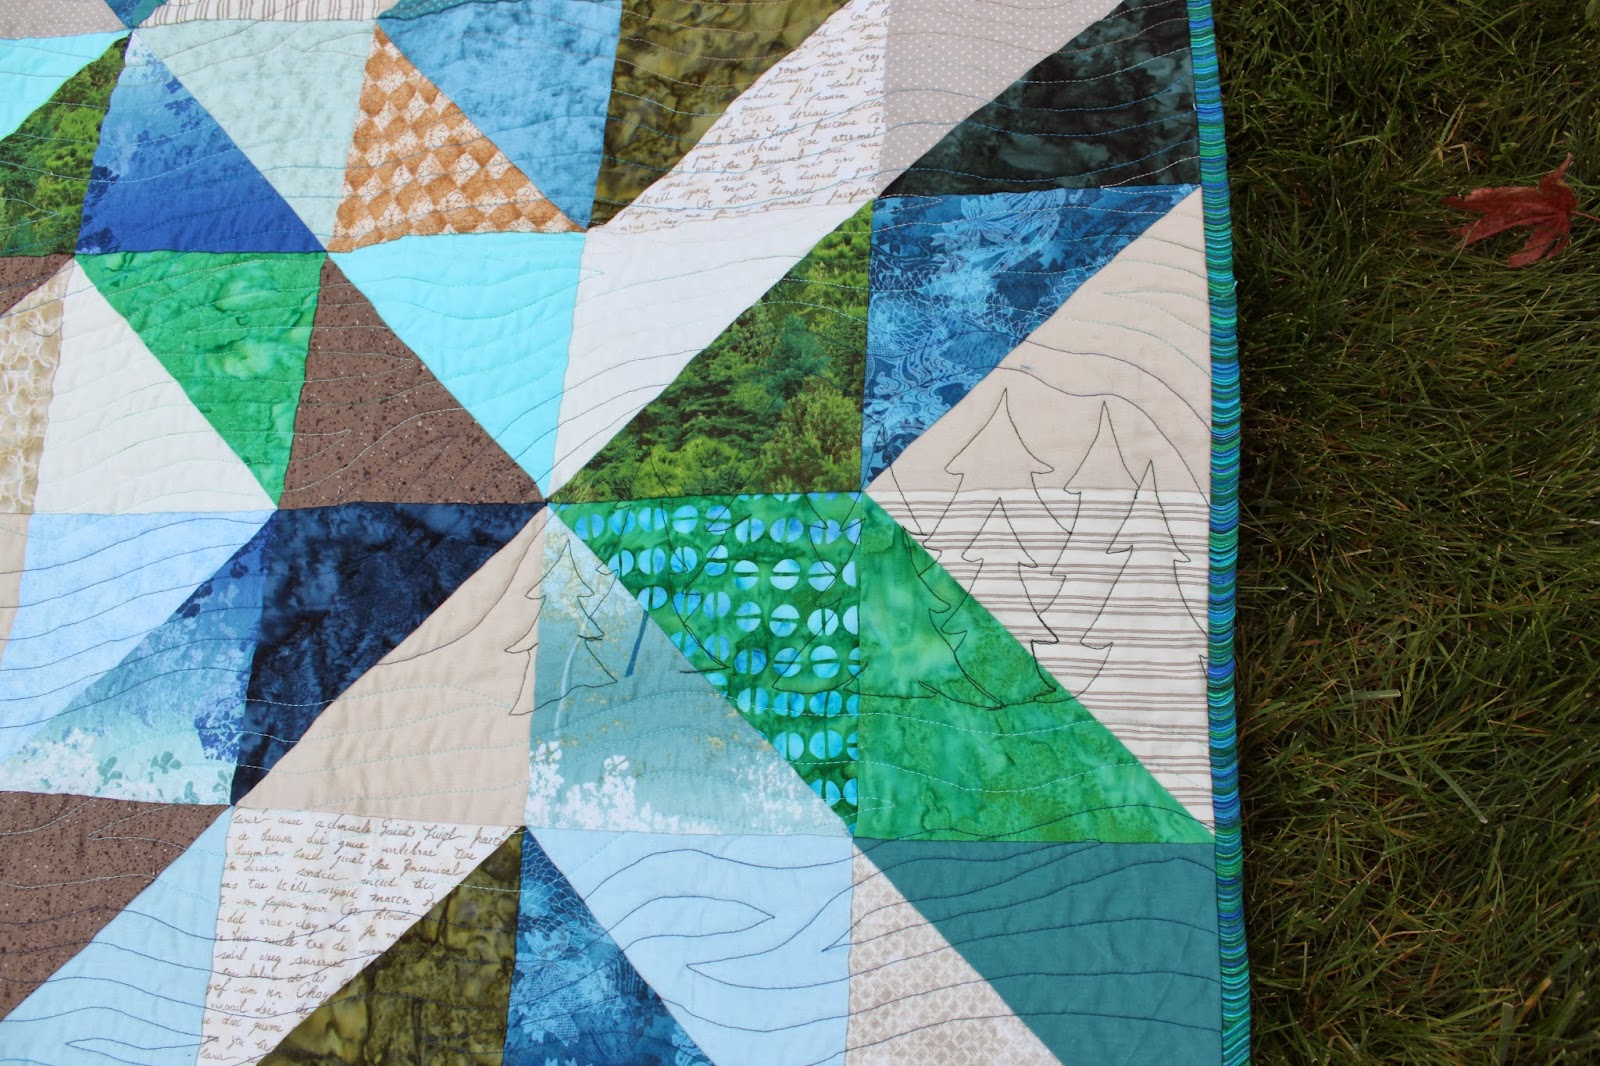

I hid the word "love" (and "forever") - wonder how long it will take for them to find it:


Oh, and did you notice the binding?  Well that was the score of the week!  I used all my leftovers for the quilt back and did not have enough of any of my dark prints for a binding.  Unless I wanted to piece a gazillion little strips - which clearly I did not.  So I set out to my favourite local store to buy something to go with the color scheme and the wavy line theme.  And what did I find?  Could this be any more perfect? 


And the final shot for today: I quilted their names at the bottom of the quilt:

 
I still need to attach the label (which is done) and to wash this quilt, after which a family member who is flying back west will deliver it to the recipient.  I am really looking forward to this quilt reaching its new home!


Thursday, 14 November 2013

Calling all Modern Quilters in Maritime Canada!

I am so excited!

Adrienne, from Chezzetcook Modern Quilts started the ball rolling for the creation of the Maritime Modern Quilt Guild.

If you are in New Brunswick, PEI or Nova Scotia, and you are into modern quilting, head over to the Maritime Modern Quilt Guild blog to find out all of the details about the upcoming first meeting.

Yay!


Friday, 1 November 2013

More cushions !

Hello, there!

Well, I am on a roll.   Relatively speaking, of course.  I have a couple more personalized cushions made (the blue one is just a prop):


The colours don't seem quite right on my pictures.  The red and light blue are a bit more muted than they appear. 


For this one I was running out of time for embroidery or appliqué, so I just drew the name and went back and forth, free-motion.  Too easy!  I did remove the lint before we gave it away...

And here's another one, embroidered by hand and improve-pieced:


The backing is a vintage sheet I adore, and the opening is closed with a velcro.


I love making those.  So satisfying!
 
You know what else is satisfying?  I started cleaning up my sewing room, and actually found stuff that had been MIA for months... like 4 seam rippers, an empty bobbin, embroidery scissors...
 
Linking up to TGIFF at Quilt Matters.
 
Happy November, everyone!

Sunday, 27 October 2013

A Finished Mini

So the other day I got the urge to start a new project.  Does this ever happen to you? he he he.

The original idea was to make a cushion, this time for a grown up.  I had been wasting time, spending time, researching on Pinterest and saw the cushion that gave me the original idea. 

As is often the case with me, I do not remember what I looked at, so I can't give proper credit.  Hopefully, my rendition is a bit different from the original inspiration.  If I copied someone's design, I am sorry and please let me know!

         EDITED TO ADD: I found it!  This is the link to the lovely quilt that inspired mine.  In my mind, the backgrounds were beige and taupe and I was making mine different by using gray... at least the circles colour scheme is different. 


This was an experimentation.  I tried a few new-to me techniques, starting with piecing quarter circles (I started with free-hand wonky ones, maybe I will try regular circles next time).  That went well.

I was both delighted and disappointed with the quilting.  My pieced quarter circles looked quite good before I quilted them, but then I decided to quilt concentric circles, wrongly thinking that it would enhance the circle shape.  To my dismay, it did just the opposite.  The circular quilting seems to emphasize what is NOT circular about the center part.  Lesson learned.


I was very happy with the rays (taken right out of Angela Walters' book).  I used three different colours of a shimmery viscose thread I had bought ages ago because they were pretty: aqua for the middle, a variegated pink for most of the rays with a small section in yellow just because.


I ended up not making a cushion but a simple mini that can be either a mini wall hanging, or can be laid on a table or other flat surface.  For the backing, I used decoration fabric (leftover from a duvet cover I made 15 years ago!) because I wanted stability.  It does not make for a pretty back, and it only occurred to me afterwards that I could have probably used the heavy decoration fabric PLUS some pretty cotton to finish it off.  Darn!  I made four corner pockets so that the quilt can be hung any direction.


Another thing that is new to me is that I machine stitched the binding.  Yup!  I am the first one surprised because hand stitching a binding is one of my favourite part of quilting.  The decision was solely due to the weight of the backing fabric.  Great to give stability for a wall hanging, but so hard on the fingers when trying to hand stitch.  I loosely followed Rita's tutorial.  It was also my first time attaching the binding at a straight angle and changing colours where the blocks meet.


This little piece is going to an unsuspecting recipient, someone who is very dear to me.  She is not a quilter, so I have no idea whether she will like this piece.  Give something you made to a crafty friend, you know they will appreciate it.  To someone who is not, well, you take your chances.  I am actually quite nervous about it.  When I showed the piece to my husband, he said something along the lines of "that's nice but what is it, and what is it for?"

 
I'm pretty sure people who consider themselves artists start with an idea of something they want to convey, and go from there.  In my case, well, it started with a picture "I like this" and then as I was working, I started to attach all sorts of meanings to what I was making.  After mulling over a couple themes that this could represent: 4 Seasons, Core/Centre, Sun, I decided that my piece represents the fact that the sun does not always look the same depending on your point of view.  I am probably getting this artist thing backwards.  Oh well.  I really had fun doing this and I hope the mystery recipient appreciates the thought.

Monday, 21 October 2013

Quilting Quandary

Remember this?  I'm sure you don't, but this was a late evening basting job that resulted in all over puckers. 
 

Note to self: do not baste after 11:00 pm.

This is the wedding quilt I have been working on forever for several months.  I thought the stumbling block to get this quilt finished was the basting fiasco.  Now that this quilt has been re-basted, turns out I have a bigger stumbling block: I have no idea how to quilt the thing!


The colours are much more accurate in the picture below.  Oh, and you are seeing are wrinkles... I swear there are no more puckers!


My machine quilting skills are improving, but there are few designs that I can tackle confidently: stippling, wavy lines, loops, you know, the easy ones...  This quilt deserves a bit more, but it has to be feasible.

Any advice ?  All over pattern?  Quilt each "box" individually? Random pattern in random sections?

Beige thread?  Green?  Aqua?  Variegated?  Quilt the lights and dark separately?

Thankfully, I have one more month - more time than I initially thought - before my "messenger" takes the quilt to the recipients.  I don't want to rush in the end, though, so I hope inspiration strikes me soon!

***

On another note, another birthday party invitation arrived today, so I am off to make another personalized cushion.  Hmmm... I wonder if my kids' friends' moms read my last post about birthday cushions...


Friday, 18 October 2013

Birthday Cushions

Another birthday, another cute sewing project!

Last year I was inspired by a blog post I had seen (I could not remember which one) to make cushions as gifts for children's birthday.   The ones I have given already have been well liked by the kids, and much appreciated by the moms.

Here's the most recent one, finished just in time for a birthday party tomorrow:


The idea of embroidering the name, rather than doing my usual appliqué, was stolen from inspired by Lucy at Charm About You.  I printed the name on paper in a font I liked and used this paper to trace the letters.  The embroidery took no time at all as it is a project so small I can tuck it in my purse and take out when I have even a very short moment.  Unlike hand quilting, you don't need a big chunk of time.  This was literally embroidered in just a few 5 minutes increments!


Thanks to the colour scheme and the prints, the result is a little more "grown-up" looking than I would have liked for an 8 year old, but I went with the colours of the birthday boy's bedroom - cream and red - and the contents of my scrap basket.  I am very happy with my efforts!

Here are a few other cushions I have made in the last year:


These were all raw edge appliqué.  I could have sworn the blogger from whom I got the idea had used appliqué...  Until I found this post by Amanda Jean at Crazy Mom Quilt, which I now recognize as being the post that gave me the idea first... And the name's embroidered!

Well, I like both techniques, and I am pretty sure I will use both of those again.  I stocked up on pillow forms last time they were on sale, so I am ready for birthday parties invitations!

Here is one more I made:


I love that this project is easily adapted for all sizes or whatever scraps you have on hand, and is appropriate for kids (and grown ups!) of any age.

Do you have a go-to gift?

Linking up to TGIFF at Quilt Matters, and Finish Up Friday at Crazy Mom Quilt.

Thursday, 17 October 2013

Another Finished Quilt!

Well, I've done it!  Two finished quilts in two weeks!  It helps that I was travelling again, and that the flights were just long enough to finish 3 1/2 sides of the binding.

After my Girly Girl Quilt and all that pink, I really wanted to work on something a bit more boyish.  So I present to you... Boyish Boy Quilt!  (Temporary name, I am sure I can come up with something better!)


I just put the last stitches minutes ago and I was too eager to wait until I could take outside pictures.
 
There are lots of things I like in this quilt, starting with the colours.  They are not colours I work with a lot, but when I pulled the fat quarters out of the stash, I thought the orange, blue, green and brown mix was a lot of fun.
 
I also love the quilting I did on the "bricks".  Most of them are back and forth lines, but I did include some pebbles.  I love the look of pebbles, but find the process quite tedious so I knew I did not want to do too much of those.  I had four bricks of that fish print, so I only quilted pebbles in those four bricks.
 
 
I used thread from Connecting Threads which is a great weight when you want your quilting to stand out a bit.
 
Finally I love the backing, which is mostly in a green flannel print, also from Connecting Threads, and the binding which I think is an Amy Butler print.
 
 
There are, however a couple things I do not like about this quilt.  I debated how to quilt the blue sashing.  I thought the orange would be overpowering and I did not have blue, so I opted for green.  I had the perfect shade in Connecting Thread but for some odd reason, I chose to go with Aurifil instead (50wt).  What a disaster!  Now, I love Aurifil, it's my favourite thread.  It just was not the right thread for this project. 
 

I thought I would experiment with different weights, but by the time I realized it was not working, I was to far into it and I did not want to unpick.  You see, I did not change my stitch length from the default which is good for piecing, but way too small for quilting.  I also used my walking foot, but I think I should have free-motioned the lines to give them a more "organic" look, similar to the lines in the bricks.

Another thing that bugs me about this project is that although I carefully planned the rows so that no two similar bricks would be aligned, I somehow reversed my middle strip and ended up with not two, but three similar blue bricks in one row!  Arghhhhh!


For all its flaws, I am still pretty pleased with the overall result.  Once it's washed and crinkly, the quilting might not look as bad, and I am sure once that whoever ends up being the final recipient of that quilt won't see it with the same critical eye as I do.
 
 
So... what have you been working on?
 
Linking up to TGIFF at Quilt Matters.