I did not feel like re-doing this block, so I made different one - same idea. I am sure someone else has done a tutorial on these wonky stars, but I have not seen one, so here is my version.
Wonky Star Tutorial
First, even though the stars are wonky, the block is not improvised. The size of each piece is determined before. Little work up front, less headache later.
Determine the size of the finished block. I am going for 9". Divide the block in an uneven 9-patch (or an even one, if you feel like it):

Note that these are finished sizes.
Next, determine the unfinished size of each piece by adding 1/2" to each measurement. See my little chart below:

L.V. stands for low volume, but I had a change of heart and went for a nice aqua instead. Here are my 9 patch pieces:

Then I cut 4 squares, approx. 3" - 4" (some were actually rectangles) and sliced them diagonally to make 8 triangles. These will form the star points. Here is the placement, but of course the points will look much smaller with seam allowance.

Sew each triangle, making sure they will cover the corner of the pink rectangle. There are other methods to do this, including using a square. I simply cut my triangles a generous size and trimmed later.

I might have kept the corner of the original piece (fuschia background) but since it is darker than the triangle, I chose to cut it. It also reduces bulk.

Sew the second corner. Repeat for the four "side" pieces.

Trim each side piece (you may need to refer to your original chart). Now, you essentially have a nine patch ready to assemble.


Ta-da!

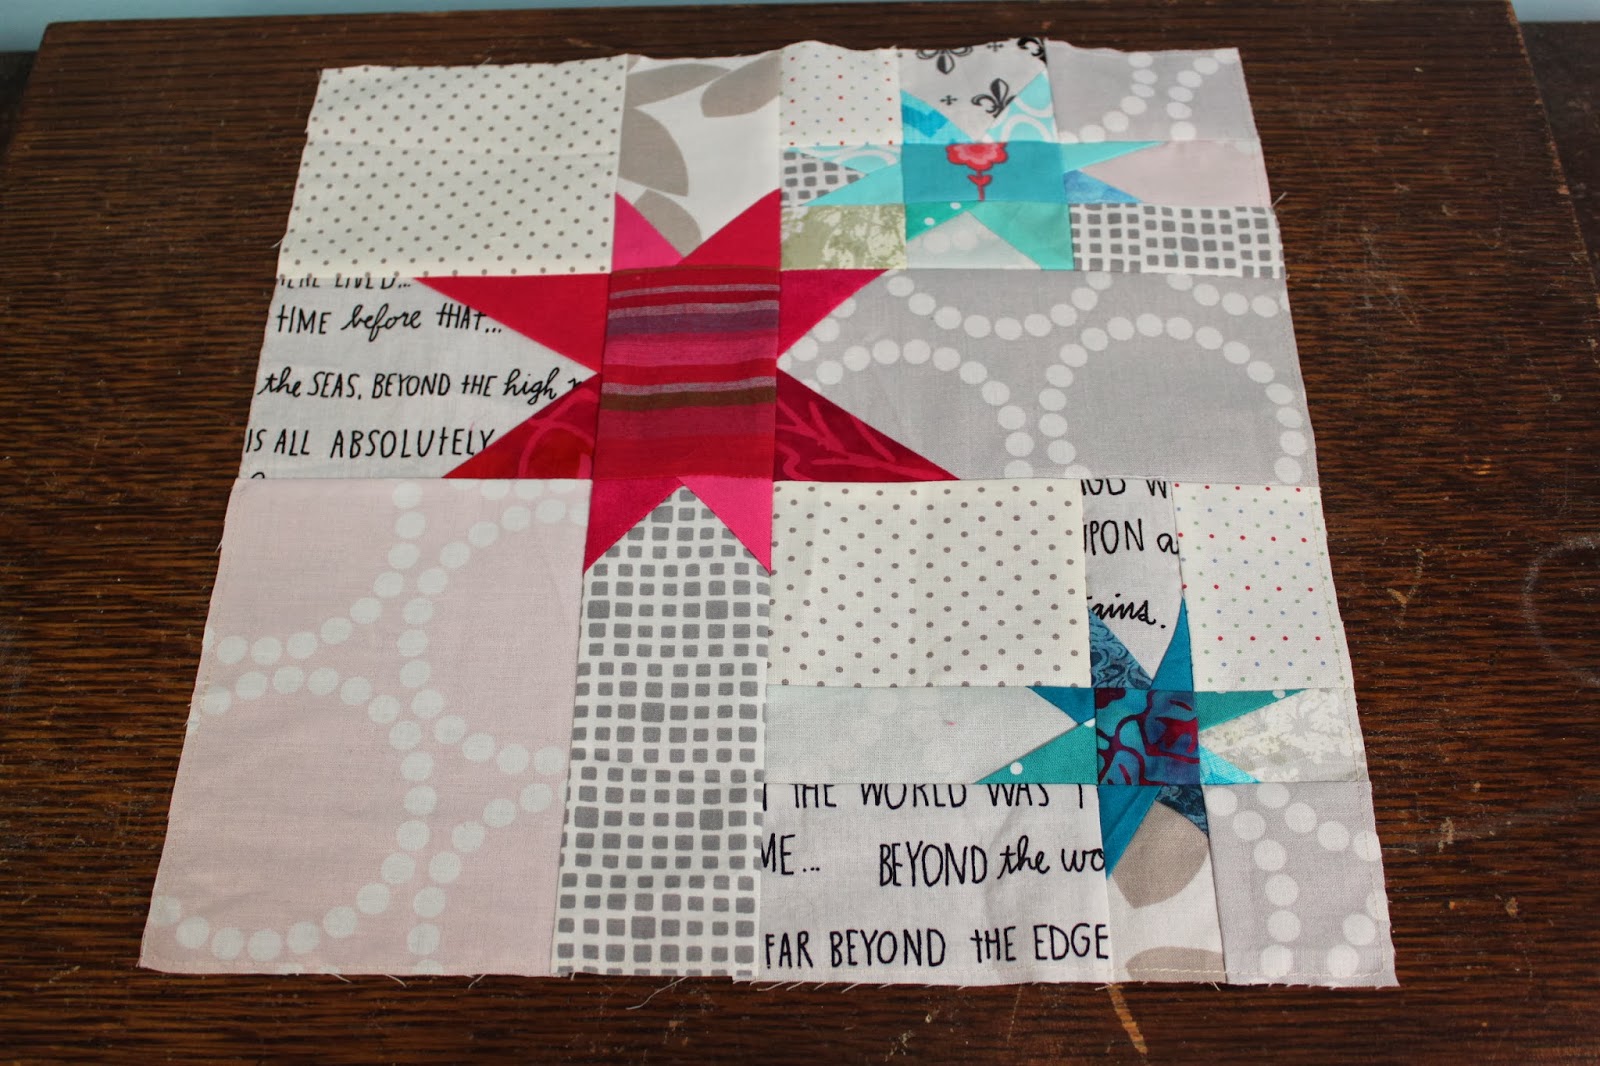
I used the same method to draft this block:

The only difference is that I took two of the corner pieces, and sub-divided them into smaller wonky star blocks.
So... what am I going to do with this 9" block? I don't really have a need for it, and I certainly don't want to start another project... Hmmmm... how about adding a low volume border to make this a 12" block and sending it to my bee mate as a little extra?

It's not exactly what she asked for, but perhaps she can use it for the back of her quilt. After seeing the complex blocks made by the other bee members, I did not want to be seen as a slacker! So I am sending two simple blocks instead of one complex one. Don't they look good together?

Hope you enjoyed the tutorial. Happy Wonky Star making, Jenn! I am looking forward to seeing your future Wonky Star quilt!
I have a tutorial written just for me! Could I be any luckier? Thanks, Dominique! Now I've got another Wanna Do on my list!
ReplyDeleteGreat tutorial, Dominique! Your bee mate will be delighted!
ReplyDeleteOoooo how I love low volume! Combine that with my love of stars and oh boy....I'm in love. Great block.
ReplyDeleteLove your bee blocks! What a great way to do improv! I checked out your quilty goals too, lots of good ones.
ReplyDeleteGreat block, thanks for sharing!
ReplyDeleteLove, love, love your first {original} triple wonky star block! I've never seen one made up like this...great work! You write up a nice tutorial and I believe the extra block will be delightful on the back of a quilt.
ReplyDeleteIt looks great! I thought your first one was wonderful too and didn't look overly simple at all. I'm glad you're part of our bee!
ReplyDeletebeaniekins84(at)gmail(dot)com
these blocks are really lovely and great tutorial too!
ReplyDeleteGreat tutorial! going on my list.
ReplyDeleteYour wonky stars put a big smile on my face! I especially love the uneven 9 patches.
ReplyDeleteLoved reading this thankks
ReplyDelete